Monster Party Favors

I had so much fun prepping for Karsyn’s 1st birthday last year! Can’t believe I am already working on stuff for his 2nd. Unfortunately, this one isn’t going to be as big, since we now live 4 hours away from any family ):

Anyway, today I am going to quickly show you how easy it was to “make” the faces on the bubbles and play dough that were inside of the treat bags!

1005490_10201656335708075_19735816_nFirst, I removed all of the labels. I didn’t really care too much about the sticky part; it was only a small line on each thing, but I knew the kids wouldn’t even notice! But, if you are worried about it, make your own Goo Gone to get it off!

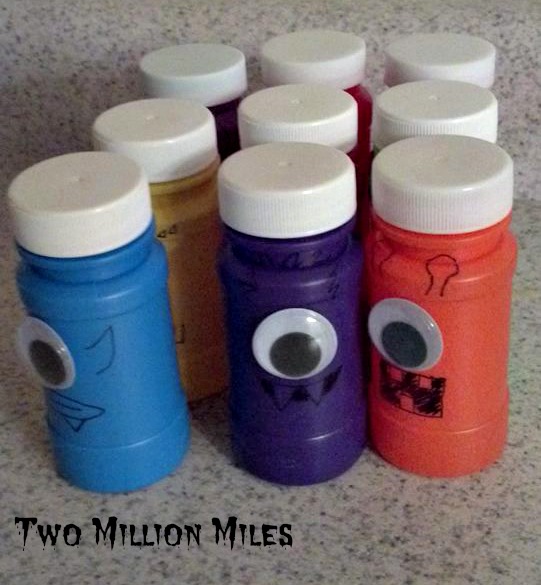
Then I added one eye to each bottle.

936517_10201656336868104_1483750786_n

Then I went crazy with the faces! I used my treat bag drawings for inspiration (;

1186161_10201656336548096_375161304_nFun, right?

1012491_10201656336108085_1485404366_nI got the packs of bubbles and play dough at the Dollar Tree. It was cheaper {yes, only by a few cents, but hey!} than Walmart.
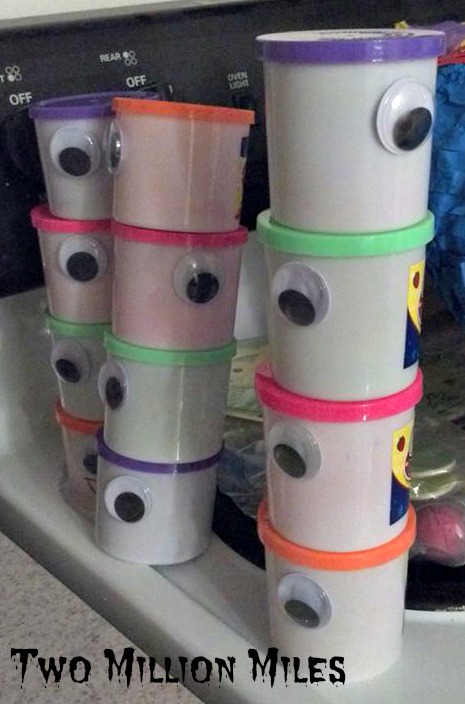
We ended up having some party packs left over, so I gave them to trick-or-treaters! This would be a way cute {and healthier} option for those little kids.

What is your go-to party favor?

signature

Subscribe

Monster Party Treat Bags

No Monster Party is complete without some Monster Party Treat Bags!

Monster Party BagsIn each bag was about 10 pieces of candy that I bought at the Dollar Store.

Monster Party Bags 4

Monster Party Bags 3Along with a cute little Monster coloring and activity book.

I hand-drew every single monster! One on each bag. And there was about 30 bags! I was inspired by each of the monsters in the activity book and the stamp I used for the invites/envelopes. Then, of course, I added a googly eye to each one! (:

Monster Party Bags 2Then I just folded the top down and stapled it. I had orange, blue, green, and a few pink bags for the girls.

12807_4747163154902_1632950674_nI thought they turned out pretty stinkin’ cute! I was really in love with each one of them!

I got each of the bags at Walmart. They were about .25 each. The googly eyes in packs of 125 from the Dollar Store. The candy at the Dollar Store. And the activity books from Oriental Trading.

Have you ever made your own party bags? How did they turn out?

signature

Subscribe

How to make a Pennant Banner

For Karsyn’s first birthday, I tried to make as many things as I could, to save money. I searched and searched Pinterest for a good tutorial on how to make a pennant banner and I couldn’t really find one, so I just had to wing it. I am not saying mine is the best, because I know it’s not, but hopefully it will help you!

how to make a pennant banner

And I will apologize, again, right now for having crappy pix! It was like 1 AM when I was making and taking.

Supplies needed:

-Paper
-Ruler
-Paper trimmer/scissors
-Letters
-Glue
-String
-Hole Punch

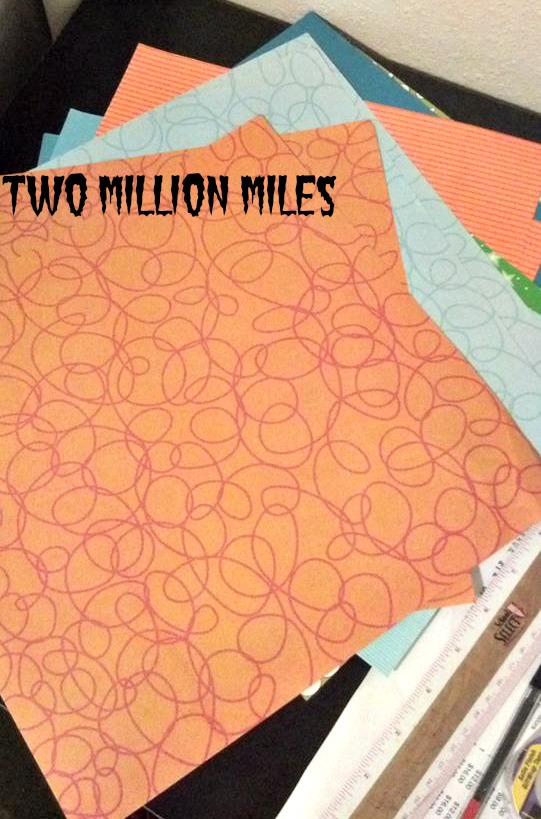
1233622_10201709547918347_290831773_nFirst, I chose some paper that matched the color scheme I was doing {which was blue, orange, and green}. I used 12×12 paper.

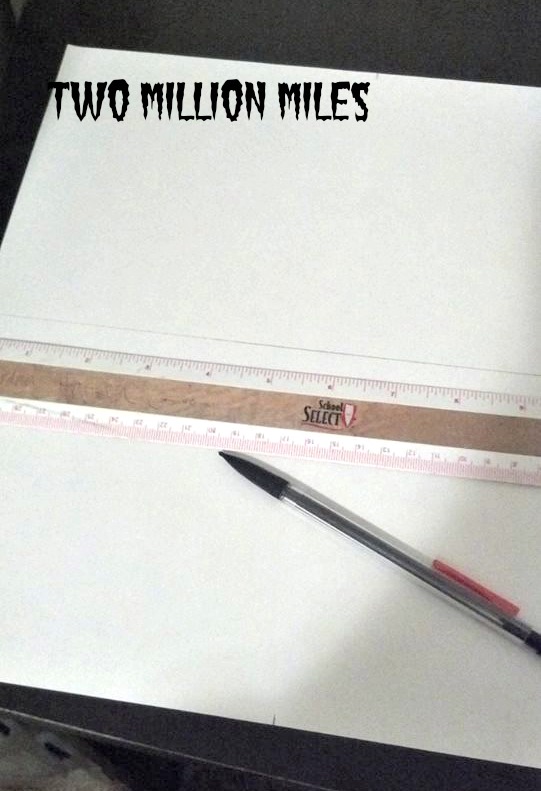
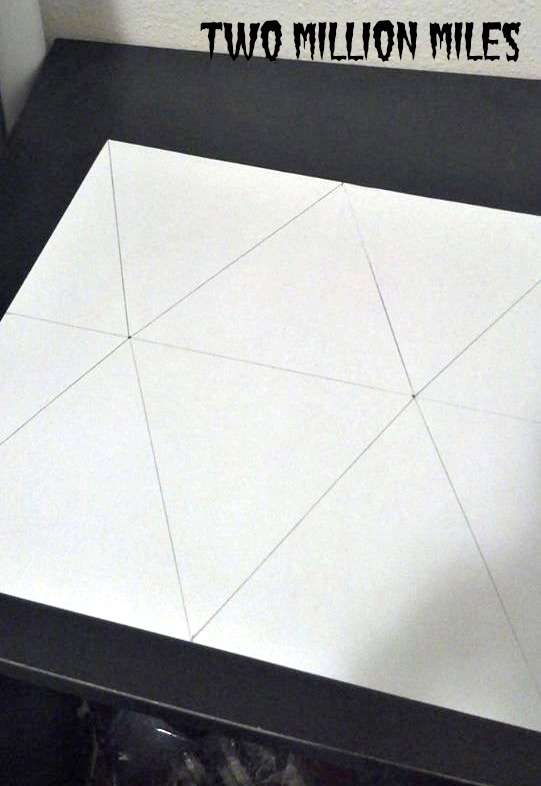
Next, I drew a line straight across the middle of the paper.

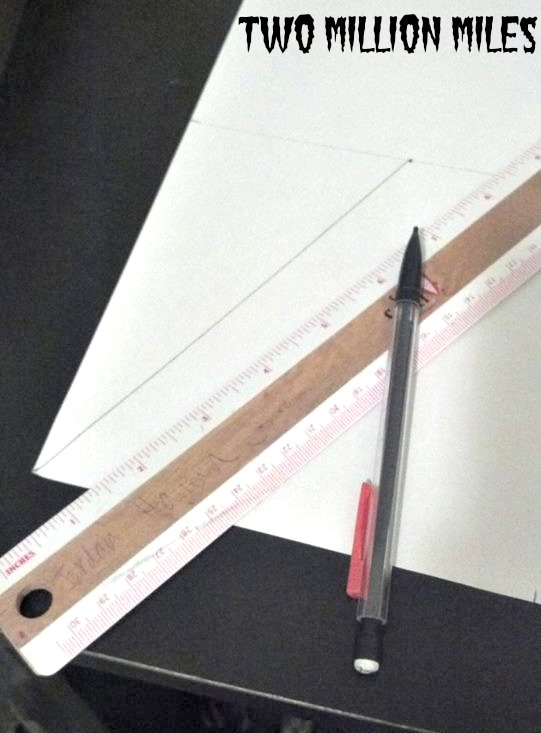
1174546_10201709545358283_129305276_nThen I drew diagonal lines from the middle to the outside of the paper, creating triangles. I believe they were about 3.5 inches?

532071_10201709546278306_2021835373_nI just did this over and over until my page was full of triangles. As you can see, I did it on both sides of the line.

998787_10201709547318332_704616316_nI also trimmed off where the lines overlapped on the bottom.

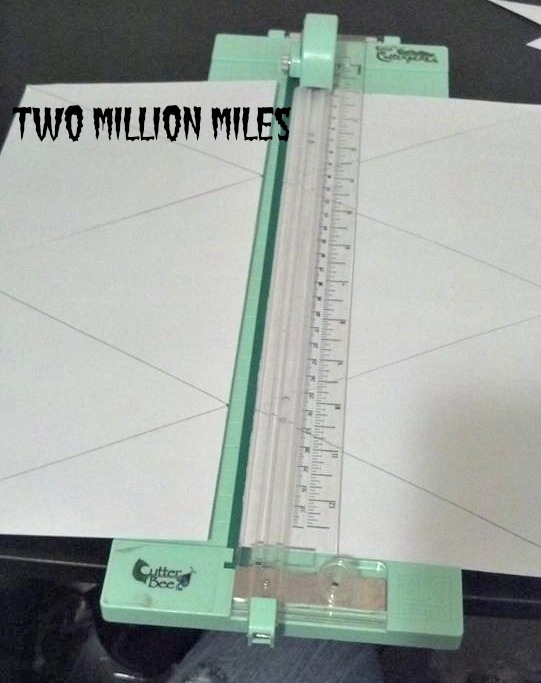
563046_10201709547078326_997961760_nThen I just used my trimmer to cut along the lines.

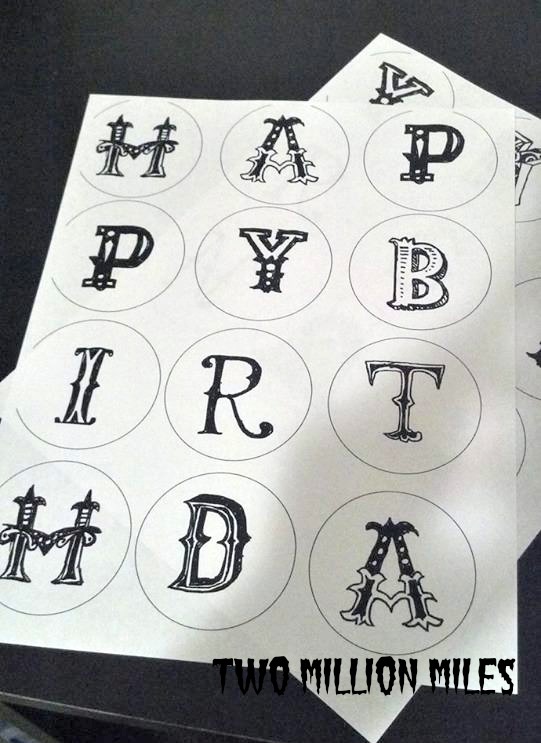
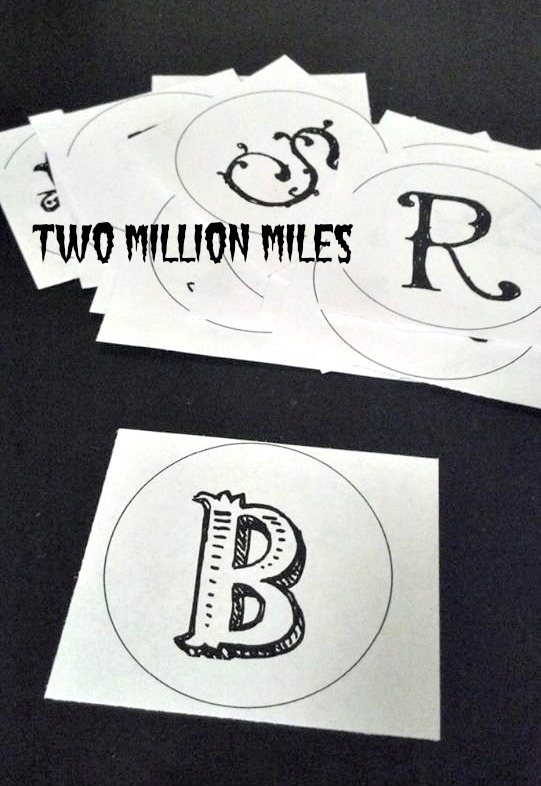
Next, I cut out the circles that had the letters on them. I just created these in Word.

536749_10201709545918297_294779358_nI can’t remember the exact font I used {so sorry!!}, but I was looking for something fun and this one was perfect.

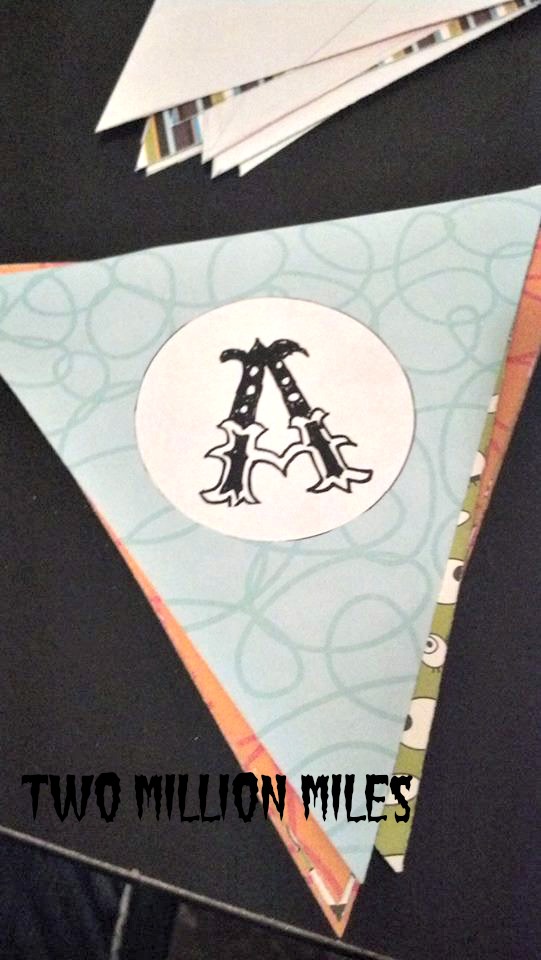
560502_10201709547638340_1292690752_nThen I glued each circle on to each little triangle.

995197_10201709542958223_1617332088_nAfter I had them all glued on, I punched a hole in each of the top corners. Then I cut a small piece of string and tied the one to another until I had each word complete. I realize that probably doesn’t make a lot of sense and I don’t have a picture to show. For the “HAPPY” I punched a hole in the top right corner of the “H” and then a hole in the top right and left corner of the “A”. So the hole from the “H” and the left hole on the “A” were tied together. Does that make sense now?

how to make a pennant bannerIn this picture, you can kind of see what I mean. Hopefully that helps you! If you have questions, please let me know and I will do my best to answer them!!

signature

Subscribe

Monster Party Pinata

For Karsyn’s Monster Party, I had a really hard time finding a Monster Pinata. I looked everywhere! The ones at Walmart were just characters, like Dora, Cars, Spongebob. They didn’t even have ANY Halloween ones. Finally, I checked online at Oriental Trading and found the perfect one!

Monster Pinata 3

It was even in his birthday party colors!

Monster Pinata

I filled it with a bunch of candy and fun little toys that I got in this assortment bag.

Monster Pinata 2

And I thought this cute little guy was missing something, so I added some googly eyes to him, of course!!
{Sorry for such crappy pix. It was REAAALLLY late!}

The kids enjoyed breaking him open! And I was so glad that I was able to find one!

Where is your go-to place for pinatas?

signature

Subscribe

20+ Things You Should Buy at the Dollar Store

20+ things you should buy at the dollar store

I’ve complied a list of items that you should buy at the Dollar Store versus Wal-Mart, Target, etc.

You really can save money by shopping at Dollar Stores.

The saying “You get what you pay for” does hold true on some items there, but for the most part, you’re getting one heck of a deal!

1 – Tape! You can get 2 rolls of clear Scotch Tape for $1!! SCORE! Tape is tape, it will do the trick. They sell the same stuff at Wally for like $2-3.

2 – Gift bags! The Dollar Tree has some SUPER cute gift bags! Like WAY cute! And they’re only $1! You can NOT beat that! The cutest ones at Wally are like $5! Who wants to spend $5 on a gift bag?! You could be spending $4 extra on the actual gift if you go with the ones from the Dollar Store. Plus, if you buy the really little bags, you will sometimes get MORE than one bag, so it makes your total cost even lower. {P.S. I do realize that Wal-Mart sells some for .97, but there is a very limited selection and they are all about the same size. You can’t get HUGE ones for .97}

3 – Tissue paper! This is something that you shouldn’t ever spend more than $1 on! It’s probably just going to get ripped up and thrown away anyway. The Dollar Tree offers different colors and sometimes prints of tissue paper. Plus, you can get huge things of it. Like 50 pieces for $1. That’s only .02 a sheet! {P.S. I realize that Wal-Mart does sell tissue paper for .97, but you don’t get as many sheets.}

4 – Gift cards! They’ve got a pretty big selection of gift cards, plus they’re usually 2 for $1. And yes, they do come with the envelopes there as well!

5 – Poster board! They offer a variety of colors and again, they are usually 2 for $1.

6 – Candle sticks! There are SO many crafts on Pinterest that require candle sticks and for just $1, you can’t go wrong. They are about $3-4 at Wally.

7 – School supplies! Pencils, pens, highlighters, notebooks, paper clips, pencil bags, etc. You can get all of this stuff for just $1! Most of it comes in packs, so you’re definitely getting the most bang for your buck!

8 – Kitchen utensils! Spatulas, mixing bowls, measuring cups, small cutting boards, veggie peelers, pizza cutter, ice cream scoop, tongs, big serving spoons, cookie cutters {pack fo 6! less than .20 each!}, etc. One of my favorite gifts to give to my friends for their wedding is a big basket {also found at the Dollar Store!} clear full of kitchen stuff! It’s stuff every household needs, so you can’t go wrong.

9 – Cleaning supplies! Sometimes they are a little bit smaller versions or generic brands, but it’s still a good deal. They do offer name brands like Awesome, AJAX, Clorox, The Works!, etc. You can also find brooms, mops, and dust pans. They all do the trick.

10 – Oven mitts and pot holders! Often times, they come in a pack of two, so .50 each!

11 – Storage baskets! They are CUTE and they make cute baskets for gifts. I love putting together a gift in a little colored basket from the Dollar Tree, plus, it’s something they can always use later.

12 – Handheld mirrors! Again, for only $1, you can get yourself a little handheld mirror. At Wally, they want like $5 for the same thing!

13 – Decorations! You might not know it, but the Dollar Tree has some REALLY cute decorations! I love to go shopping there for cute little things to put around my house. And you seriously can’t beat it for $1!

14 – Craft supplies! I ALWAYS check the Dollar Store for the supplies I need to finish a craft before I go anywhere else. More often than not, I find what I’m looking for. {When I was doing Karsyn’s Monster Party, I used a TON of googly eyes. They are 150 for $1 at the Dollar Tree. Wally wanted .97 for 15. RIP OFF!} Plus, they have lots of cute kid craft kits to help keep your little ones occupied while you are busy.

15 – Tooth brushes! I don’t always buy mine there, but Karsyn’s, I do. They have cute little character ones there, like Toy Story and Cars, for just $1! He doesn’t need anything extravagant right now and he’s more than happy with it.

16 – Pregnancy Tests! It may seem weird because they are only $1, but at Wally, you can pay up to $40 for ONE test! What a joke! And I promise I am telling the truth when I say that the Dollar Store tests are JUST AS EFFECTIVE as the ones at the Doctors office. I even asked my doc when I was first pregnant.

17 – Coloring books! This is another thing that often comes with more than one. They make great party favors and in all actuality, they are cheaper than the 4 for $1 at Wal-Mart because these ones are bigger and have more pages.

18 – Glass wares! Things like vases, wine glasses, mugs, plates, etc. {Now, I am not suggesting you buy your whole dish set from there because I do think you can find a better deal elsewhere.} These things are good for crafting and gifting and cost a lot more elsewhere.

19 – Cello bags! I ALWAYS buy the cute little printed cello bags there. I use them to stick orders in. Like when someone orders some Posh, I will put it all in the bag, tie and curl a ribbon around it and it’s all ready! Lots better than just a plain clear bag. I also do it with my jewels {locals only – I don’t do it fancy when I ship it because I usually have to bubble wrap it.}

20 – Party supplies! Things like napkins, paper plates, paper cups, cutlery, streamers, etc. are good at the Dollar Store. {P.S. I realize that you can get them at Wally for .97, but plain colors only. They rarely have printed ones for .97}

I also asked this question on my Facebook pages {Jourdan’s Jewels, Jourdan’s {Handmade} Jewels, and Perfectly Posh with Jourdan}, “Fill in the blank: I ALWAYS buy _______ at the Dollar Store” and here are some of the answers that I got, minus the ones that I have already stated above…

-Trash Bags

-Candles

-Candy

-Nail Polish

-Make-up

-Batteries

-Ziploc bags

-Balloons

-Rewards for kids

-Smell good stuff

I could go on and on about some really good finds at the Dollar Store, but I think you get the gist! Stay tuned for “What NOT to Buy at the Dollar Store”.

*Disclosure: All of these opinions are 100% my own! I was not compensated in any way or contacted by any of the stores mentioned to write this post.

What do you ALWAYS buy at the Dollar Store?

Eyeball Board + Monster Party Invites

One thing that I didn’t get a picture of at Karsyn’s Monster Party, was of this cute board. It was displayed on the same table as the cupcake cakes.

I got this board from Finger Snapper a LONG time ago. They are having the deal again right now, so click here to get it.

I didn’t take a picture of each step because I made it before I had a blog, but I’ll tell ya what I did.

First of all, I bought the paints at Wal-Mart for .97! SCORE! I love how inexpensive paint is. I knew his colors were going to be orange, blue, and green, so I painted each square a different color. Then the empty one black. I knew I was going to mod-podge a picture of him on it, once I got them done.

It looked cute with just plain paint, but I wanted something more, so I found one of my polka dot stencils and did a different color on each square. It was still cute, but kinda boring. I had a bag of googly eyes laying around, so I added one to each of the bigger circles. And wa-la!

Oh, I forgot to add that I painted around the outside AND inside edges black. And it’s okay if the black gets on your squares. (:

And I never did do a post on the invites that I made..

I had always planned to make them myself with paper and cut-outs and stamps and all of the above, but my creative juices were NOT flowing and I was getting really, super frustrated, so I just went into PicMonkey and made the invites.

Here’s a quick run-down of how I did them..

Click “Create a Collage”. Then click the middle button {on the left hand side} and it will give you a bunch of different layout options. I clicked the Pinter-etsy tab and chose the third one in. Then I saved it and went back to the main screen for just the basic editing. From there I added the words and shapes in each box. The colors I used were supposed to be a LOT brighter, but they never print out the way they look on screen. ):

They were still cute.

Then I stuffed them inside the envelopes, along with this picture…

He’s so cute!

Have you ever bought anything from Finger Snapper? Have you used PicMonkey to create anything before?


Karsyn’s 1st Birthday {Monster Party}

*Warning: This is full of CUTE pictures!

_______________________________________________________________________________________________

On Saturday, October 27th, we celebrate Karsyn’s FIRST birthday! I made most of the decorations. It was exhausting, to say the least, but VERY worth it. I am glad to have it over with, though. We had a good turnout!

Take a look….

When you first walked through the doors, you saw a sign that said “Beware of the little Monsters! Enter at your own risk!”

Then as you walked in, there was the Pinata hanging from a coat rack. {We had to get creative. Couldn’t hang it very high since it was mostly little kids at the party.}

Then as you kept walking, there was a table with the goodie bags.

In the middle of this table was my cute frame.

On the other side of the table were the bubbles and Play-Doh.

Then once you were all the way in, there were three tables for you to sit at.
These were my center pieces.

Then on the far left-hand side was a table with the cupcake cakes. {They were delicious, needless to say.}

I had Fresh Market make them. I was SO happy with how they turned out. And the frosting is whipped. If you aren’t getting whipped frosting, there is something wrong with you. WHIPPED FROSTING, PEOPLE!!

There were also plates, napkins, and cutlery on the table. Off to the side of that table was a round table with the drinks.

We made Fresh Lime.

Above the three tables where people could sit down to chat and eat, was the present table. And above that hung the “Happy Birthday Karsyn” banner.

That was pretty much it as far as details.. I didn’t get all the pictures I wanted, but I can’t complain.

Now on to pictures of the fun {mixed up.. they aren’t in order.. sorry!}

My sister and cousin showing of the adorable Monster suckers!

Karsyn getting the cake smashed in his face.
It’s a tradition, people. Don’t judge.
This is not abuse.
It happens to every kid in our family on their 1st birthday.
Like it or leave it.

“What’s in there?!”

Kade’s family.. Sister Ashlee, Grandma Lenna, and mom Cindy

Hitting the Pinata

He wasn’t too impressed with me.

After they had FINALLY broken open the Pinata.
My brother {in the red.. with the devious smile} broke it with his hand.
He’d had enough of the wimpy hits!

My cousin and sweet baby sis.

Isn’t she cute?
I love her. to. pieces.

Our little niece, Emersyn.

Karsyn, Me, Kade, Emersyn

He was so polite when unwrapping his presents.
He would tear off a little baby piece, had that little baby piece to me to throw away.
And repeat.

Riding his new trike that my dad got him.
He loves that thing!

Emmy hitting the Pinata.

A train set that my Nana got him.
It’s unpainted, so that will be a fun craft for us to do as a family.

Peter {plugging his nose – married to Cherish}. Cherish {Kade’s sister – Emersyn’s mom}, Kade, my dad, Hagun {my bro – in the black}, Tarris {my other bro – in the red}

Isn’t that hat cute?!
My cousin makes them.
Head over to Stitches and Giggles to get ya one!
She has all kinds.


My Nana {my mom’s mom} and cousin Dax

Momma and the Happy Birthday Boy!

Don’t you love his boots?

They light up. (:

Pin the Eye on the Monster

Her face is PRICELESS!

Before his face got smashed in it.

Silly girls!

Fam{ily}

Yummy.
Whipped frosting!

Givin’ the bear loves.

Givin’ Emmy loves

The smash cake

If you made it through all these photos, good job! We had a blast! Karsyn was pooped by the time it was over.

What was your favorite thing about Karsyn’s party?

Pin the Eye on the Monster

Hey lovelies! How are you? Long time, no post.

I’ve missed blogging. Life just seems to get in the way. Plus, I like to do everything on Kade’s computer cuz his is fast. Mine is slower than a turtle. But his charger decided to take a dump {for the 6th time in 4 months}, so we had to wait for a new one to come.

And now here I am. On my computer. Because Kade is on his. Rats!

I am going to show you how I made this super cute game for Karsyn’s birthday!

Pin the eye on the monster! So cute, right?!

You’ll need:
*2 large poster board papers {I got white and green. Two for $1 at Dollar Tree.}
*Black Sharpie
*White paper
*Some form of glue
*Google eyes
*Scissors
*Pencil

The monster shape was inspired by the one I used for the invite envelopes.

I lightly drew the monster shape on to the green poster paper.

{I know.. You can hardly see it. I said lightly!}

Then I cut it out..

He looked a little boring just like that, so I drew an outline on him..

{Crappy pic. Sorry!}

Then I drew a mouth on him.

Now on to the eyes..

I just found some scrap pieces of white paper. Then I got out one of my cups to trace. They were the size I wanted and I knew I wouldn’t be able to freehand a decent looking circle.

Then I cut them out and drew an outline around them.

I picked out the biggest google eyes out of my bag.

Then I just got some double-sided tape and stuck them on!

And there you have it! A super fun game for the kids to play and one that you can easily make!

Oh, and as you can see, I just {double-sided} taped the monster to the white poster board and wrote on it.

Unfortunately, we didn’t play it at the party, so I didn’t get any pictures of it being played. ): All the kids were concerned about was the Pinata.

{And if you look close enough, you can see that the one leg is crooked. Karsyn is to blame. He tore it off and I told Kade to stick it back on. That’s how it looked.


Fresh Lime

At Karsyn’s party, I needed a drink that would be good for everyone to drink, that wouldn’t stain clothes, and that was super easy and fast to make.

Fresh Lime!

Everyone loves fresh lime.

I borrowed my mother-in-laws drink fountain thing, got four 2 Liters of Sprite and 4 limes, and a 7 pound bag of ice.

I sliced each lime in to four pieces, then poured in the Sprite, then squeezed in each lime, added the ice, and put the lid on.

I didn’t mix it up or anything because it does that on it’s own pretty well.

It was a hit!

And for those little kiddies that happened to spill, it was fine. No stains, just sticky. (:

{Kade’s sister Ashlee, Grandma Lenna, and Mom Cindy sippin’ on some Fresh Lime.}

Monster Cupcake Cakes

Now that Karsyn’s party is over, I can share all the fun photos and tutorials!

First off, if you haven’t caught the theme of the party yet, it was MONSTERS!

The colors were green, blue, and orange.

I had Fresh Market make these Monster Cupcake Cakes for me. They did SUCH a good job and I cannot even begin to explain how YUMMY they were.

Angel food cake and WHIPPED frosting. Mmmmmmm….

How do they look?!